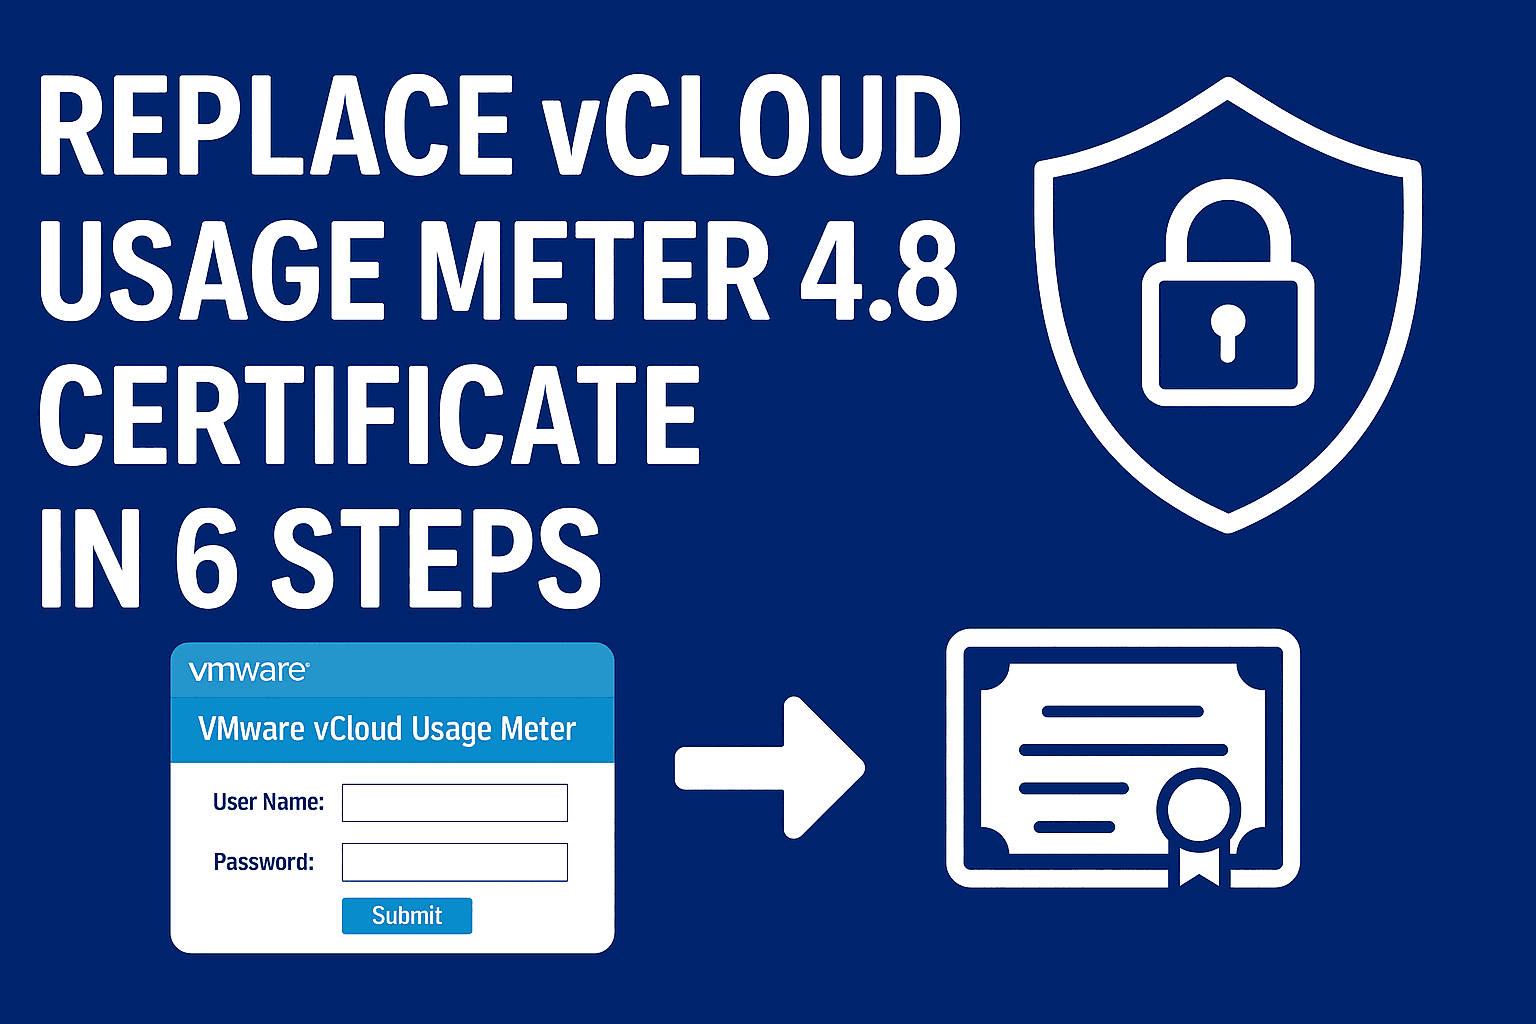
Replace SSL Certificate for VMware vCloud Usage Meter 4.8
When you first deploy vCloud Usage Meter, the appliance automatically generates a self-signed SSL certificate.
If you access the vCloud Usage Meter web interface over HTTPS for the first time, your browser will prompt you to manually trust this certificate.
For better security and trust, or certificate expiry you can replace the self-signed certificate with one issued by an external or internal Certification Authority (CA). This ensures encrypted connections are verified by a trusted authority.
All vCloud Usage Meter applications share the same Java keystore and CA certificate store. The appliance updates the NGINX certificates automatically each time the operating system starts. Unless otherwise specified, commands can be run in the appliance console as the usagemeter user.
To manage the appliance remotely, you can either enable SSH access or execute commands via the vSphere web console.
The appliance stores main SSL certificates in:
/opt/vmware/cloudusagemetering/platform/security/keystore
CA certificates in:
/opt/vmware/cloudusagemetering/platform/security/cacerts
By replacing the default self-signed certificate with a CA-signed certificate, you enhance both the security and the credibility of your vCloud Usage Meter deployment.
I have recently replaced the Usage Meter certificate in my environment, which was about to expire, with an internal CA-signed certificate (using Windows Server and OpenSSL).
Let’s explore this simple way to replace usage meter ssl certificate with FIPS mode disabled.
Prerequisites
- Make sure to take appliance snapshot before proceed
- Verify FIPS Mode (show fips status )
- You have windows server joined in domain and open ssl tool installed to generate the Certificate and key files.
- Generate a certificate signing request (CSR) and submit it to Internal Certificate Authority
- Obtain the signed server certificate from the Internal CA
- Export certificate from .p7b to .pfx with password
- Convert .pfx to .crt and .key files using openssl commands
- Import and install the ssl certificate for Usage Meter 4.8
How to Replace an Internal Certificate Authority (CA) – Signed Certificate for vCloud Usage Meter Appliance 4.8 with Disabled FIPS Mode
To Replace Internal Certificate Authority Signed Certificate, first you need to get the certificate by requesting CSR from your organization’s internal CA (Internal Certification Authority)
Step 1. Generate the CSR and submit request for certificate to internal CA.
The easiest way to request the certificate from any windows server (domain joined) and once you receive raw certificate.
you will need to copy the certificate data into a text editor and save them as separate files with .p7b extensions
Step 2. Install the certificate (.p7b)
- Install the certificate on the device from where you generated the CSR (same windows server)
- After installation the certificate, check the certificate path should have valid chain and key icon (

- Should not have any × mark in chain

Step 3. Export .pfx with password from the installed certificate
You need two (.crt & .key) files to replace the certificate in vCloud Usage Meter 4.8 and to generate both the files export .pfx with password
- To do so – Go to Run – type “certlm.msc” (certificates) – Personal – Certificates in windows server (where you have installed the certificate) – Right click on installed certificate (usually it should be with usage meter appliance name or fqdn) – Click on All Task – Export – Next.

- Click on Yes Export the Private Key – Next.

- Check the box “Export all Extended Property“

- Enter the password (make sure to write down the password which you have entered ) this password will use in further steps

- Click on Next and Save the file with usage meter appliance name.pfx , you can save in c:\temp or your preferred location
Step 4. Generate the .crt and .key files from that pfx using Openssl
Check if you have openssl install in that windows server or downlaod openssl for windows and install.
- Verify via cmd run as admin – C:\WINDOWS\system32>openssl
OpenSSL> - Once verified – Navigate to the location where you saved .pfx, example: c:\temp
- run the following commands one by one to generate the certificate and key file, it will prompt for password two time, enter the password which you have given during pfx export
"openssl pkcs12 -in usagemetername.pfx -nocerts -out usagemetername.key"
"openssl pkcs12 -in usagemetername.pfx -clcerts -nokeys -out usagemetername.crt"
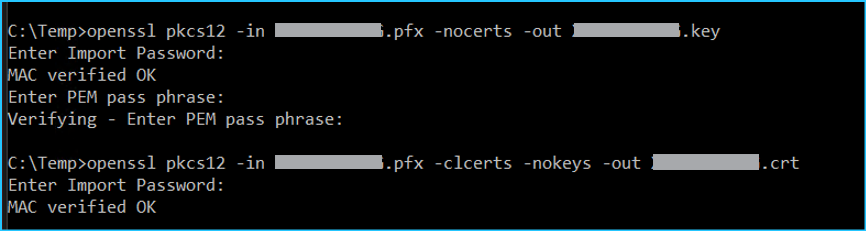
- Replace usagemeter name with your actual .pfx file name (e.g. umappliancename.pfx) which you have saved
- Now you have two files in C:\temp\ usagemeter.crt and usagemeter.key.
Step 5. Import and install the certificate in vCloud Usage Meter 4.8
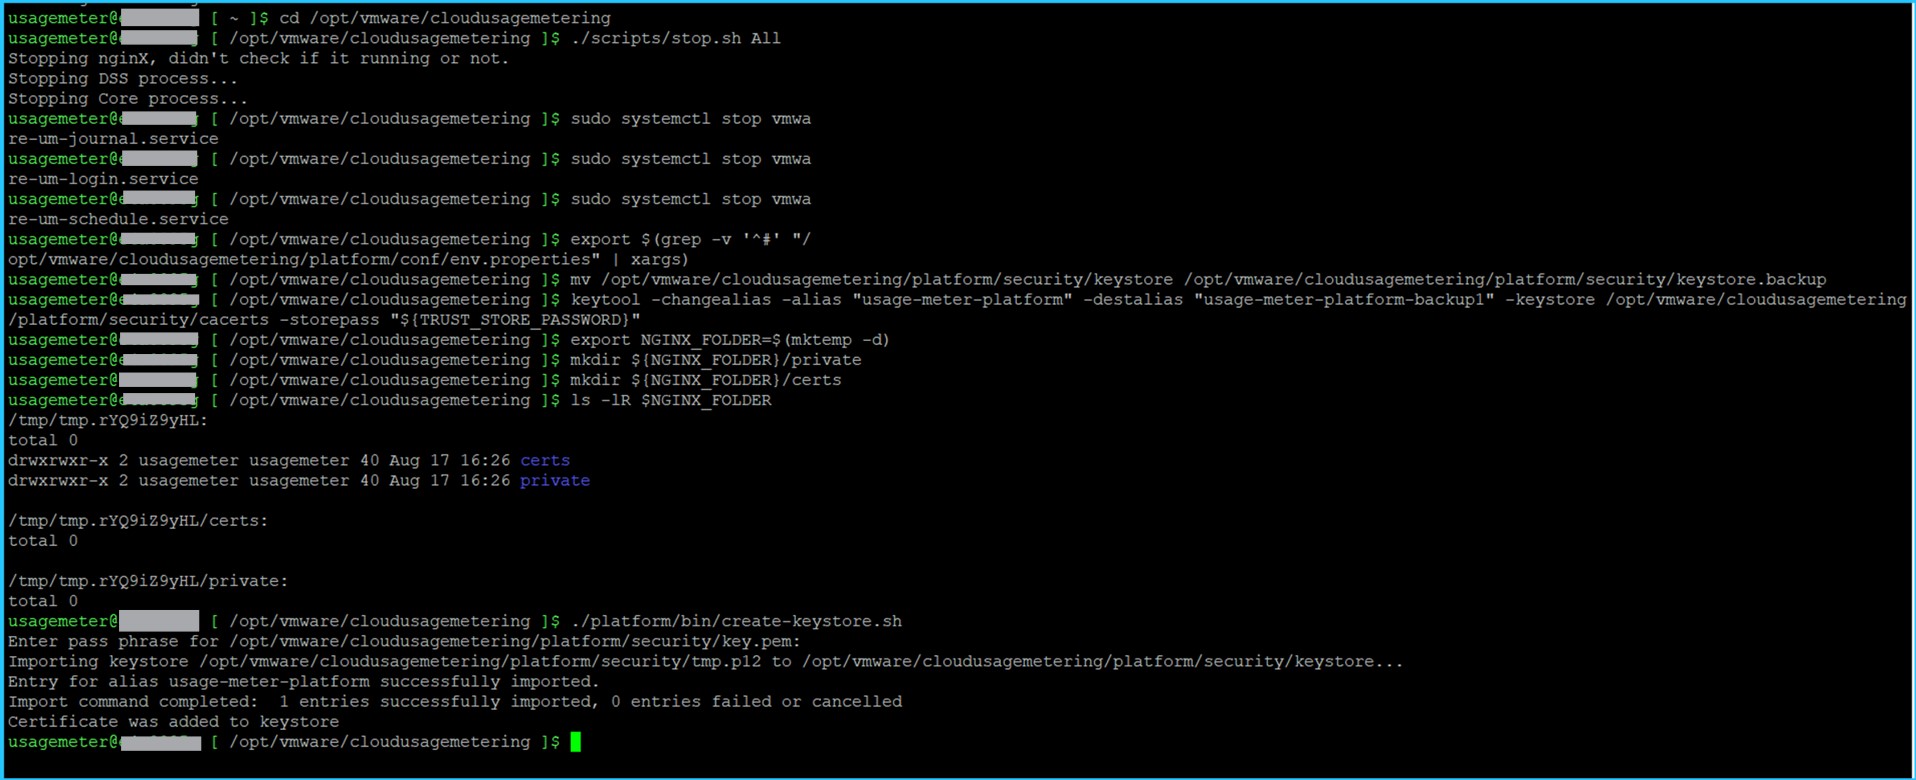
- Connect Usage Meter appliance via putty or log in to the vCloud Usage Meter console as “usagemeter” and stop all appliance services.
Note : Make sure you are performing all the following steps only under : /opt/vmware/cloudusagemetering.
cd /opt/vmware/cloudusagemetering
./scripts/stop.sh All
sudo systemctl stop vmware-um-journal.service
sudo systemctl stop vmware-um-login.service
sudo systemctl stop vmware-um-login.service
sudo systemctl stop vmware-um-schedule.service
- Export the environment variables.
export $(grep -v '^#' "/opt/vmware/cloudusagemetering/platform/conf/env.properties" | xargs)
- Back up the existing vCloud Usage Meter appliance certificate.
1. Back up the existing keystore.
mv /opt/vmware/cloudusagemetering/platform/security/keystore/opt/vmware/cloudusagemetering/platform/security/keystore.backup
2. Move the existing keystore entry from the specified alias to a new alias.
keytool -changealias -alias "usage-meter-platform" -destalias "usage-meter-platform-backup1" -keystore /opt/vmware/cloudusagemetering/platform/security/cacerts -storepass "${TRUST_STORE_PASSWORD}"- Import the CA-signed certificate and private key to the vCloud Usage Meter appliance.
1. Create a temporary directory and set the directory path to the NGINX_FOLDER environment variable.
export NGINX_FOLDER=$(mktemp -d)
2. Now create two temporary sub-directories within the temporary directory.
mkdir ${NGINX_FOLDER}/privatemkdir ${NGINX_FOLDER}/certsNote: These folders will get created in usage meter /tmp /tmp.xxxxx. (If require use command ls -lR $NGINX_FOLDER to find the directory)
3. Upload the CA signed certificate to the ${NGINX_FOLDER}/certs/ folder and rename the file to nginx-selfsigned.crt.
4. Upload the CA signed private key to the ${NGINX_FOLDER}/private/ folder and rename the file to nginx-selfsigned.key.
You can upload using “WinSCP” or your prefer tools .
- Create a new keystore for the CA-signed certificate.
./platform/bin/create-keystore.sh
- You should now see an output similar to the following:
“Entry for alias usage-meter-platform successfully imported.
Import command completed: 1 entries successfully imported, 0 entries failed or cancelled
Certificate was added to keystore”

If you received message similar to the above without any errors, it indicates that the certificate replacement has been successfully completed.
Step 6. Configure Permissions, Remove Temp & Backup and Reboot appliance
- Remove all temporary and backup folders, also delete the old Usage Meter certificate.
rm -rf $NGINX_FOLDER
rm /opt/vmware/cloudusagemetering/platform/security/keystore.backup
keytool -delete -alias "usage-meter-platform-backup1" -keystore /opt/vmware/cloudusagemetering/platform/security/cacerts -storepass "${TRUST_STORE_PASSWORD}"- Configure the permissions for the keystore.
chmod 0640 /opt/vmware/cloudusagemetering/platform/security/keystore
- Reboot the Usage Meter appliance
sudo reboot
Reference Screenshots:

If installation of the CA-signed SSL certificate on the Usage Meter appliance is successful, no security warning is displayed the next time you log in to the vCloud Usage Meter Web interface.
Explore more about vCloud Usage Meter Certificate Management in Broadcom official article .
Dive in more related articles at vlookuphub